Stripe billing
Stripe Billing lets your agency automate payments, subscriptions, and metered usage for clients directly within ChatDash.
Last updated 2 months ago
Connect Your Stripe Account
In the Agency dashboard, click Stripe Billing in the left sidebar.
Click Connect.
Enter your country code, then click Connect Stripe.
You’ll be redirected to Stripe’s onboarding portal—complete all required fields before submitting to avoid disabled payouts.
After submitting, you’ll be sent back to ChatDash and see a confirmation message in the Stripe Billing page.
Tip: You can verify the connection by logging in to your Stripe Dashboard—look for a new connected account.
Create Your Products
In the Agency dashboard, switch to the Active Products tab on Stripe Billing page.
Click Create Product.
Choose a pricing model:
Base Subscription Fee: Flat recurring charge; optionally set a usage limit and overage fee.
Usage Based: Metered billing (charged by usage metric).
One-Time: Single invoice, charged once.
Fill in product details:
Name and Description
Price / Unit Amount
Currency
Billing Period
Tax Inclusion
For Stripe to automatically calculate taxes, Stripe tax has to be configured for your connected account. Navigate to the tax page in your Stripe dashboard.
Yes: The price you set for your product is the price with tax already included. So clients will be charged the amount you set.
No: Tax is not included in the price you set so the client will be charged the price you set plus tax for the client’s country. (e.g. $25.00 + tax)
Usage Metric:
Interactions for text-based agents.
Minutes for voice-based agents (Stripe displays usage in seconds—ChatDash handles the conversion).
Conversations for all platforms.
Value-Based for Retell, Vapi, and ElevenLabs. This is for tracking custom analysis fields (only boolean) agency set up in the platform for their agent. Learn more.
Click Create—the product is now available for assignment.
Create Subscriptions
In the Agency dashboard, switch to the Subscriptions tab on Stripe Billing page.
Click Create Subscriptions.
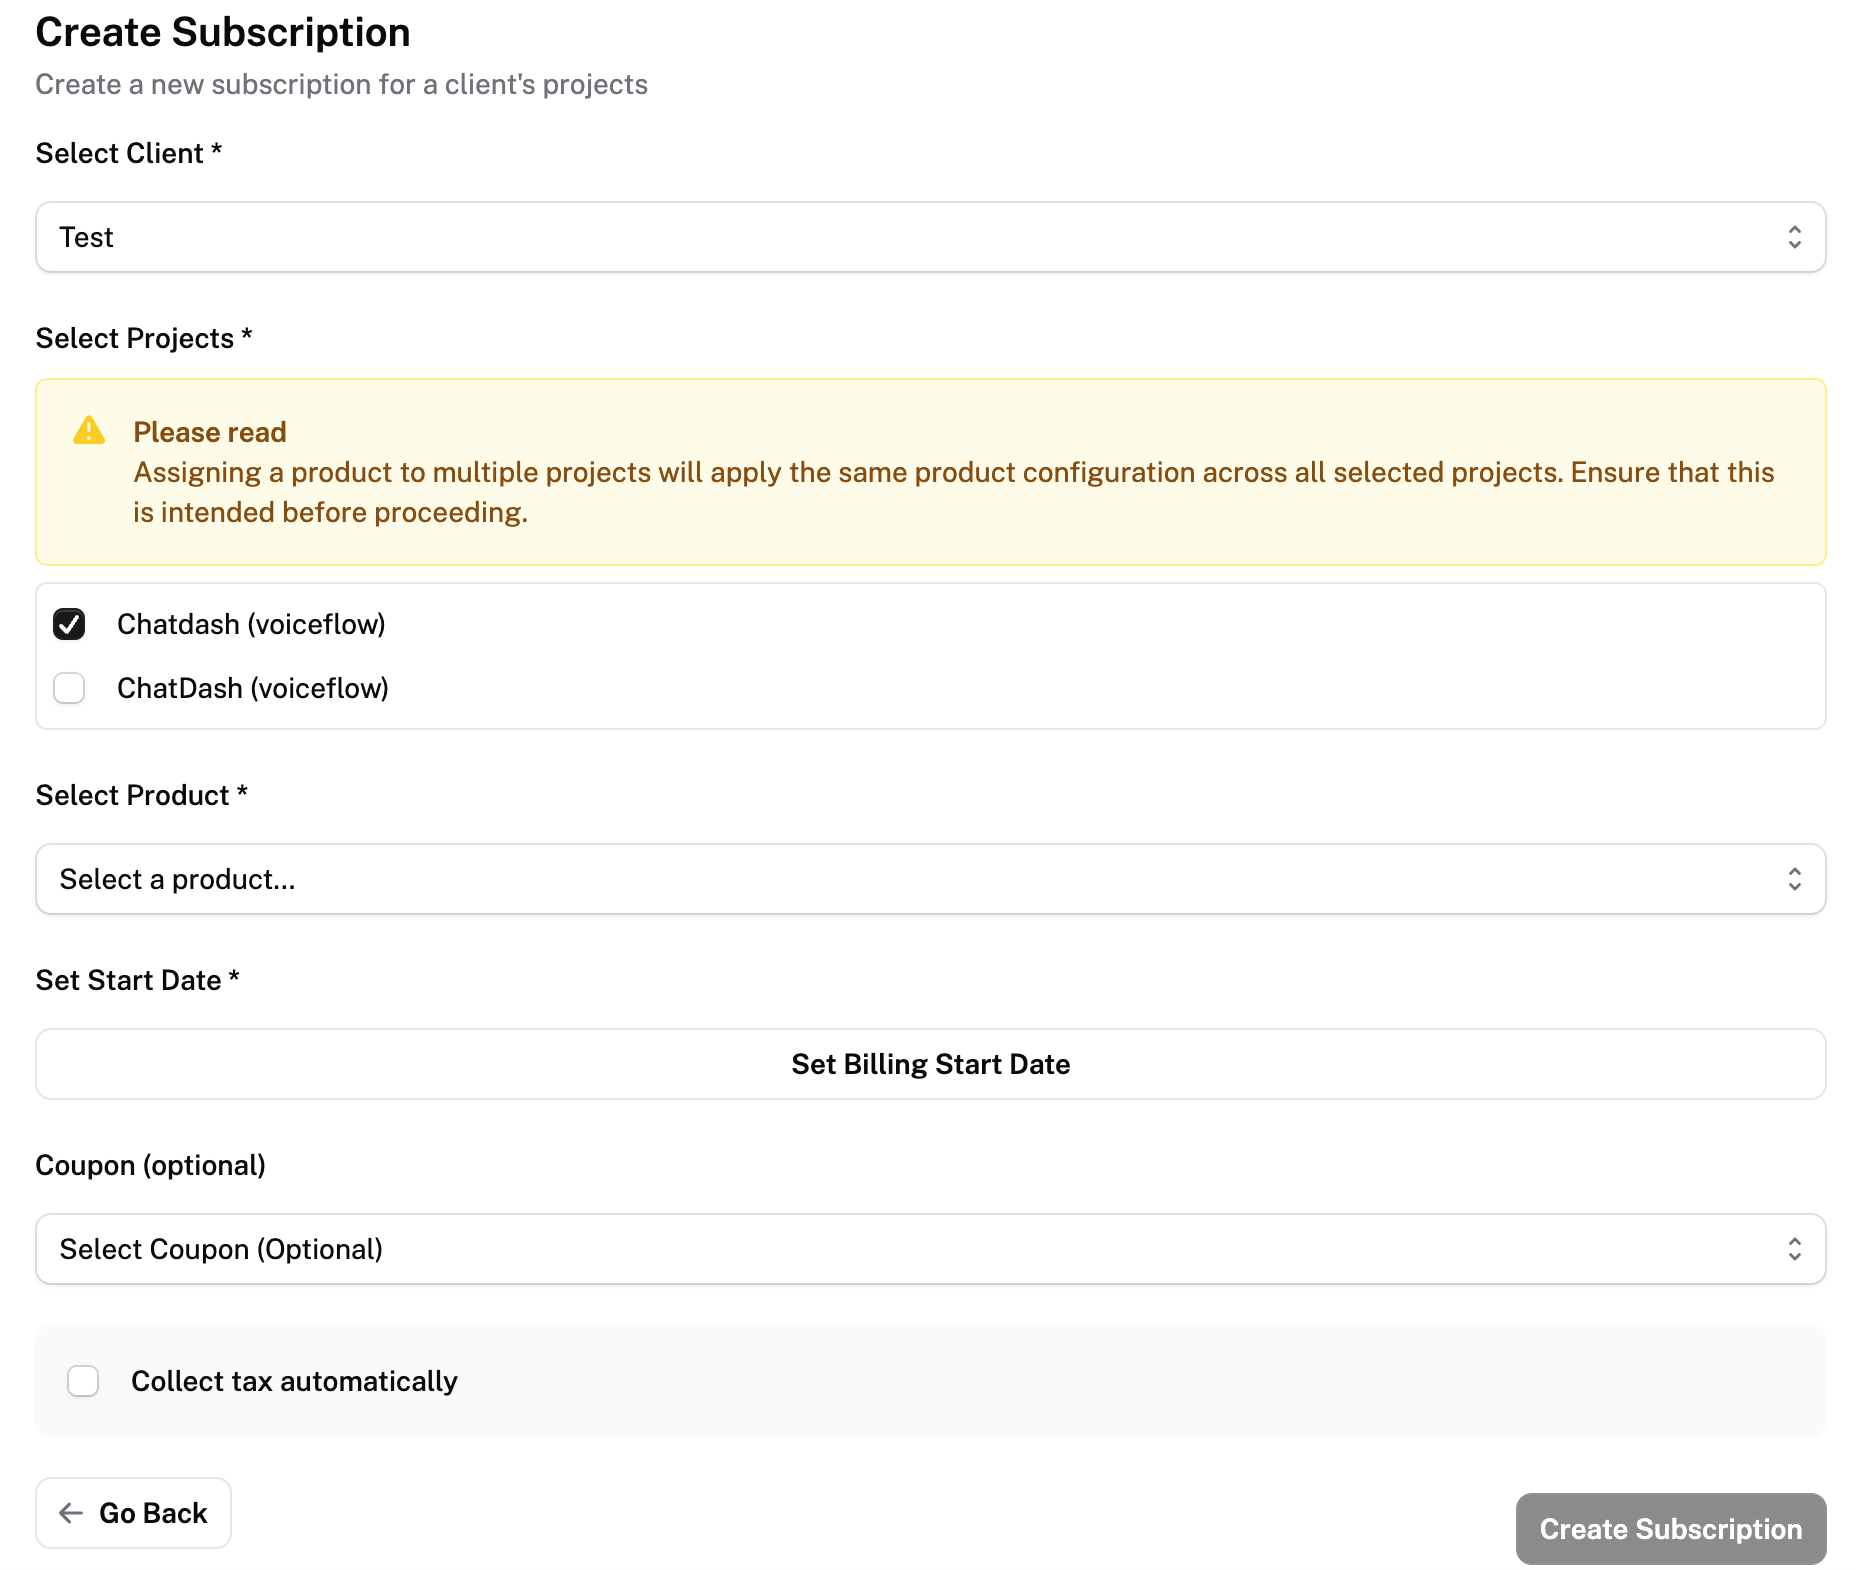
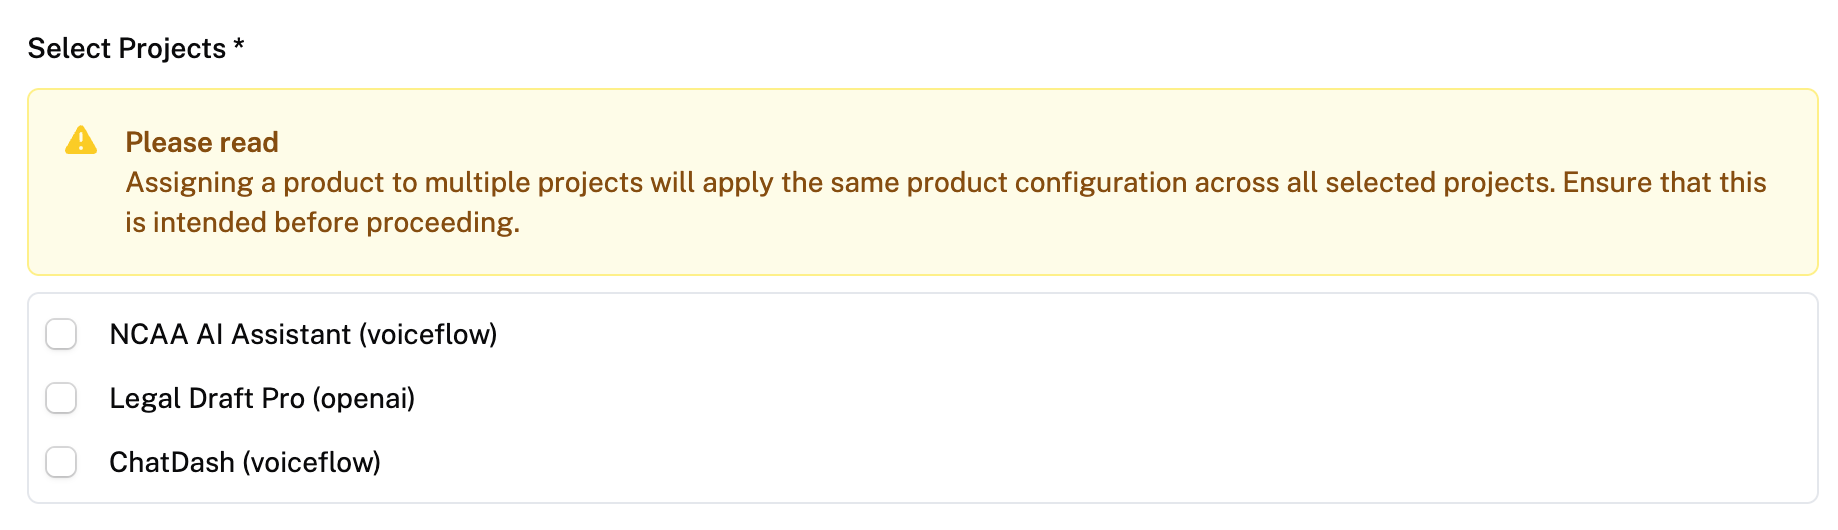
Select the client, agent, and product and set a billing start date.
When more than one agents are selected, this will create one subscription for the client instead of multiple subscriptions (one for each agent). Learn more.
Check Collect tax automatically and input the client’s country and postal code (if asked)
Select a coupon if you want to add.
Click Create Subscription.
All setup is done on the agency side—clients cannot access anything in their dashboard until they've added payment.
Client Payment Flow
When clients log in, they will see an Add Payment button.
They must add a card before accessing their dashboard.
Once added, their subscription or metered charges will bill automatically each cycle.
Clients can review subscription details in Subscription Details on their dashboard.
Client Payment Failure
Client’s dashboard access will be blocked when subscription cancels after payment failure.
To block client’s dashboard access, navigate to Stripe dashboard → Select connected account → Settings → Billing → Subscription and Emails → Manage failed payments for subscriptions. Customize the number of times you want to retry failed payments and select cancel subscription for subscription status if all retries for a payment fail.
You can reactivate the client account anytime but note that the subscription will remain cancelled. You can create a new subscription for this client.

Automate client onboarding with payment links
Sell a subscription with a payment link, and let ChatDash do the onboarding for you. When a customer checks out through your link, ChatDash automatically creates the client in your workspace, sets up their login, and connects them to their new subscription — no manual data entry. If your product also charges for usage, you can start metering each agent you assign to that client.
What you'll need first
A connected Stripe account. In Stripe Billing → Connect Stripe, make sure your account is connected.
A product with a base subscription fee. In Stripe Billing → Active Products → Catalog, create a product with a recurring base price. If you also want to bill for usage (per minute, interaction, or conversation), add a usage limit and overage price to that product.
Step 1 — Create a payment link
Go to Stripe Billing → Active Products → Payment Links.
Click Create payment link.
Choose the product the customer will subscribe to.
On the Payment page tab, pick what to collect at checkout:
Customer name is always collected (it's used to create the client).
Optionally collect business name, billing address, phone number, tax automatically, promotion codes, and business tax IDs.
On the After payment tab, choose what the customer sees once they pay:
Show Stripe's confirmation page (optionally with your own message), or
Redirect them to a page on your website.
Click Create.
Step 2 — Share or embed the link
In the Payment Links list, use the icons on each link:
Copy – copy the link to paste into your website, a button, or an email.
Preview – open the live checkout page to see exactly what your customer sees.
Add the link wherever your customers will buy.
Step 3 — A customer checks out
When someone completes checkout through your link, ChatDash automatically:
Creates a client in your workspace using their name and email.
Creates a login for that client (you can edit this information anytime).
Connects the client to their new subscription.
If you've reached your plan's client limit, the client is still created but left deactivated. Free up a client slot or upgrade your plan, then reactivate the client.
Step 4 — Assign an agent (and track usage)
Open the client and assign an agent.
If the product includes usage-based pricing, you'll be asked whether to track usage for the agent(s) you just assigned. The prompt names the client and product so you know exactly which subscription it applies to.
Select which agents should report usage and confirm. Those agents will now be billed for usage on top of the base fee.
If an agent isn't compatible with the product's usage type (for example, a voice agent paired with a text-based usage metric), it's marked Not compatible and won't be tracked.
Managing your payment links
Edit – update what's collected or the after-payment settings anytime. The link URL stays the same, so anything you've already embedded keeps working. (To sell a different product, create a new link instead.)
Deactivate – stop a link from being used. Anyone who has it can no longer check out.
Good to know
The payment link charges the base subscription fee. Usage billing is added per agent in Step 4.
Customer name and email are always collected because they're required to create the client account automatically.
Charging One-Time Products
In the Agency dashboard, Stripe Billing → Invoices.
Click Create Invoice.
Select the Client and the One-Time Product.
Choose Auto-charge (immediate payment to client’s card on file) or Request Payment (email invoice).
Click Send.
Note: Request Payment requires the client’s admin member to have a valid email on file.
Billing Cycle Overview
Base subscription fee only
An invoice is generated and payment is collected at the start of each billing cycle.
Usage-based products
Stripe meters your usage throughout the billing period according to the meter configuration.
At the end of the period, usage is aggregated into a single total.
That total is billed on the invoice generated at the start of the next billing cycle.
Mixed subscriptions (base fee + overage fee)
At the start of each cycle, one invoice combines:
The base subscription fee for the new period
The previous period’s aggregated usage charge
So your clients will only be charged for the base subscription fee on the first cycle.
Value-Based Metric
Agency has to have boolean analysis fields set up for their agent. You can add it in the platform’s site.
Create a product in product creation page.
Select the metrics as Value-Based and create product.
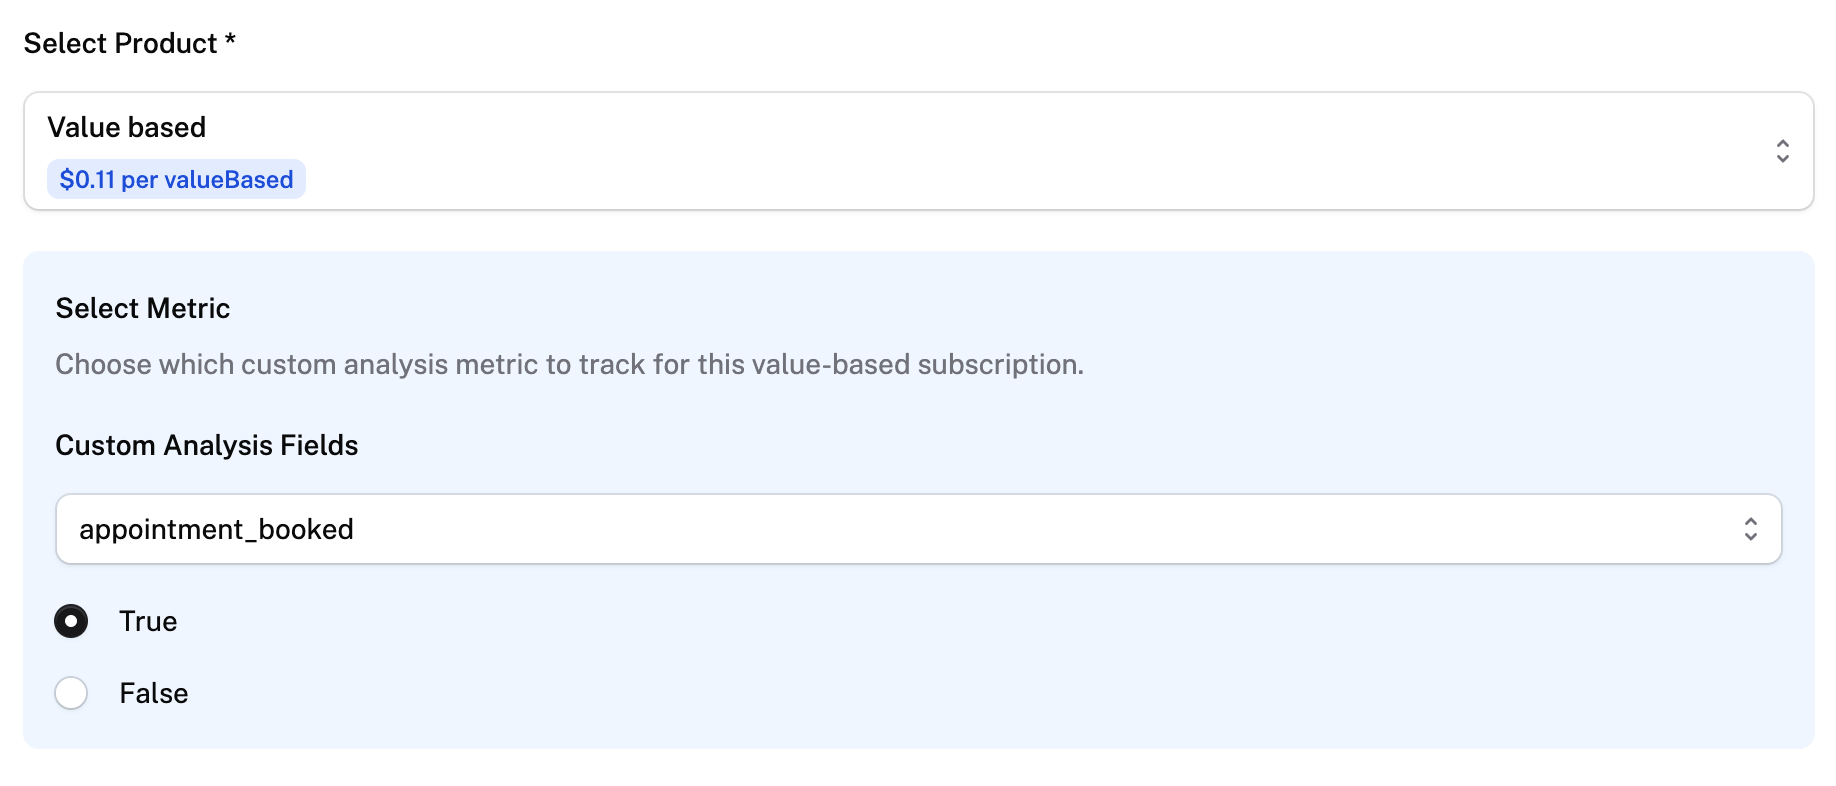
Now when creating a subscription, select the value-based product.
Select the custom analysis field you want to track.
(e.g. When appointment_booked = true is selected, you will charge your clients for every conversation that successfully booked an appointment)
One Subscription for Multiple Agents
Creating a subscription for multiple agents will apply the same product configuration across all selected agents.
This means if a $25/month + $0.05/minute product is assigned to 3 three agents a client has, only one subscription will be created and the client will be charged $25 + (0.05 * total minutes for all three agents) once per month.
Scheduled Subscription
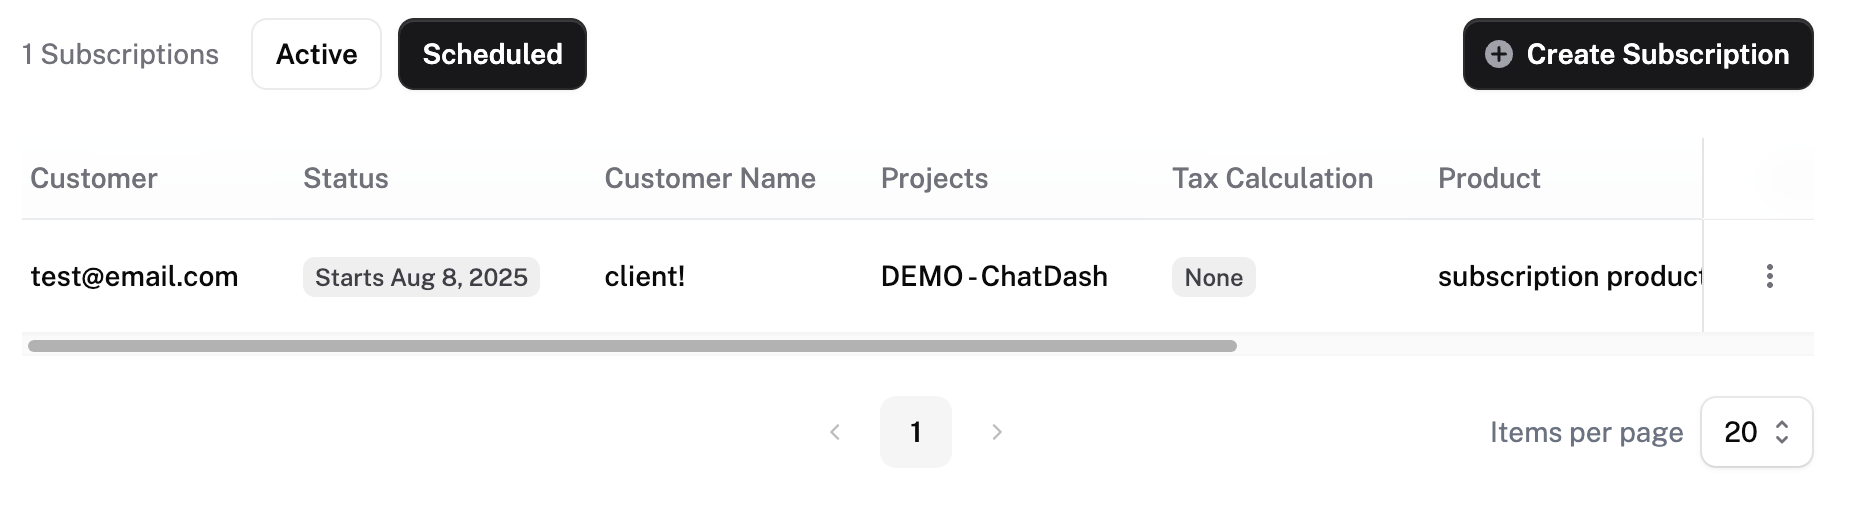
Subscriptions that have a starting date in the future will be shown in under the Scheduled section
Installment plan
Installment plans let you charge a client a fixed total across a set number of monthly payments and billing stops automatically once the final payment is made. They're ideal for things like a setup fee you want to split up, for example a $2,000 onboarding fee billed as 4 monthly payments of $500.
Creating an installment plan
Go to Stripe Billing → Subscriptions and click Create Subscription.
At the top of the form, choose Installment plan.
Fill in the details:
Client — who you're billing.
Total amount — the full amount to collect (e.g. $2,000).
Number of monthly payments — how many months to split it across (e.g. 4).
First payment date — defaults to today. Pick a future date if you'd like billing to start later.
Product name — the name that appears on the client's invoice (e.g. "Onboarding setup fee").
Collect tax automatically (optional) — turn this on to calculate and add tax based on the client's location.
Review the summary — it shows the per-payment amount and the total (e.g. "4 monthly payments of $500 — total $2,000").
Click Create installment plan.
The plan starts on the first payment date and cancels itself automatically after the last payment.
Making sure the client can pay
If this is the client's first charge and they don't have a card on file, they'll be prompted to add a payment method the next time they log in to their dashboard.
Good to know
Installment plans divide the total evenly. If the total doesn't split evenly, you'll see a note showing the exact amount that will be collected.
A client can have an installment plan running alongside their regular subscriptions.
Once all payments are collected, the plan completes on its own — there's nothing you need to do to stop it.
Coupons
Create Coupons
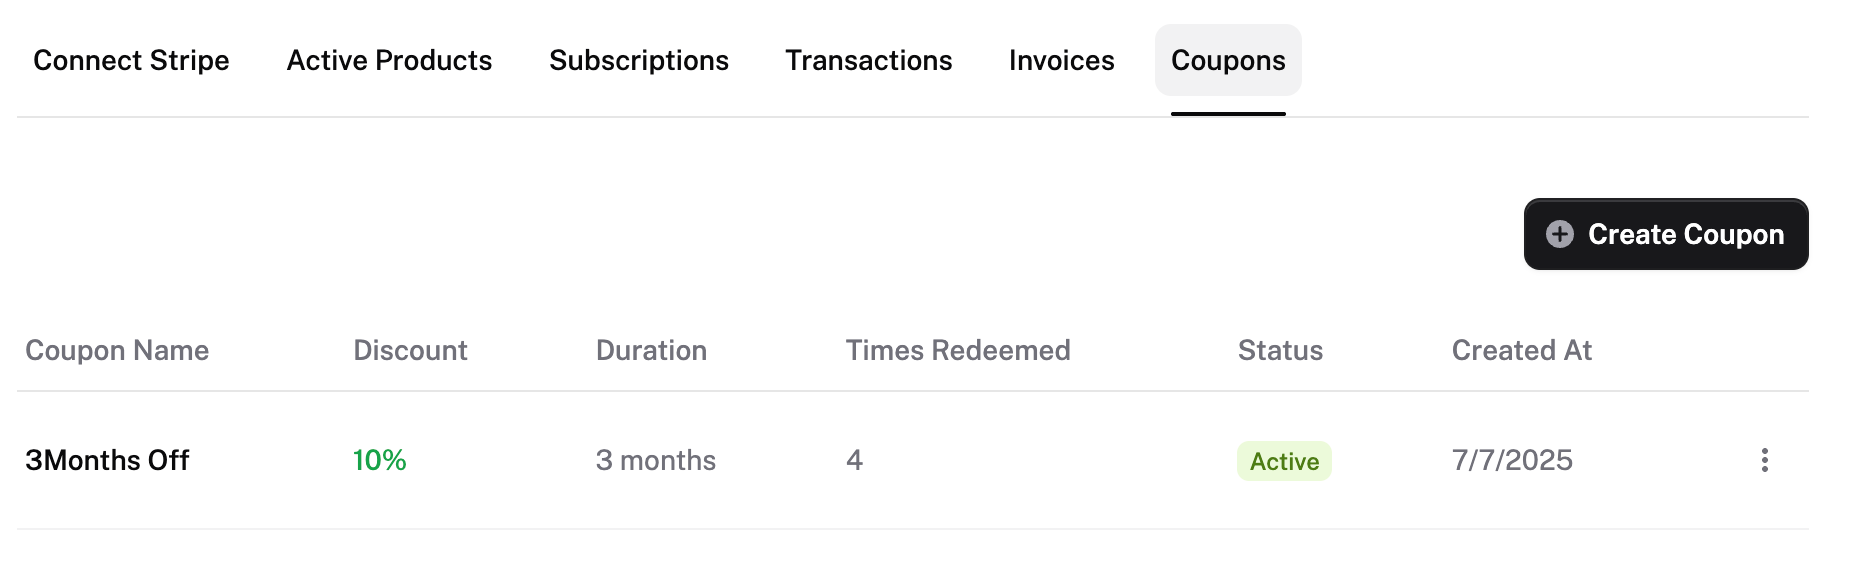
In the Agency dashboard, switch to the Coupons tab on Stripe Billing page.
Click Create Coupon.
Fill in coupon fields:
Name
Discount Type (Percentage or Fixed Amount)
Percentage/Amount Off
Currency
Duration
Once
Forever
Multiple Months
Click Create—the coupon is now available for assignment.
Assigning a coupon to an existing subscription:
Navigate to Stripe Billing → Subscriptions
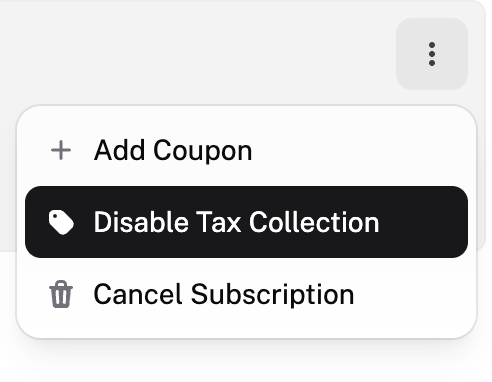
Click on the dropdown button and an Add Coupon button will appear.
Select the coupon and apply.
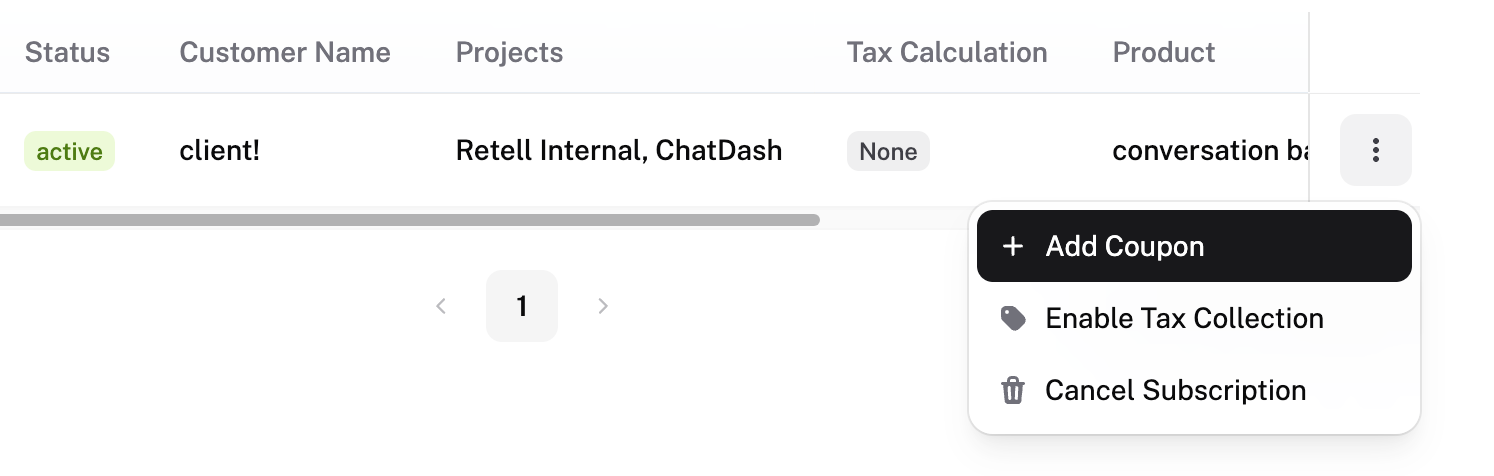
When a coupon is applied, the Add Coupon will be changed to Remove Coupon.
Tax Collection
When creating a new subscription, follow the Assign Products to Clients steps above to enable collecting tax.
Stripe Tax has to be configured in your Stripe Dashboard for Stripe to collect tax automatically. Navigate to the tax page in your Stripe dashboard.
When enabling tax collection for existing subscription
Navigate to Stripe Billing → Subscriptions
Click on the dropdown button of the subscription and an Enable Tax Collection button will appear.
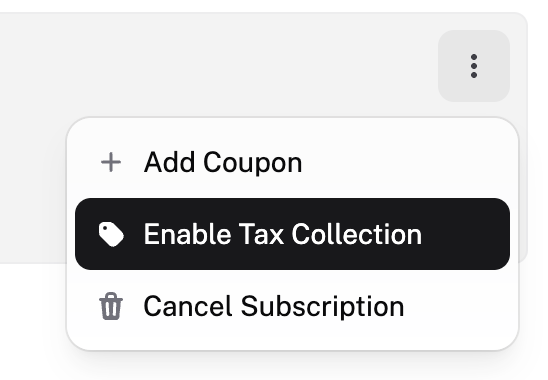
If Stripe does not have the client’s address information, we will ask you to input the country and postal code for the client.
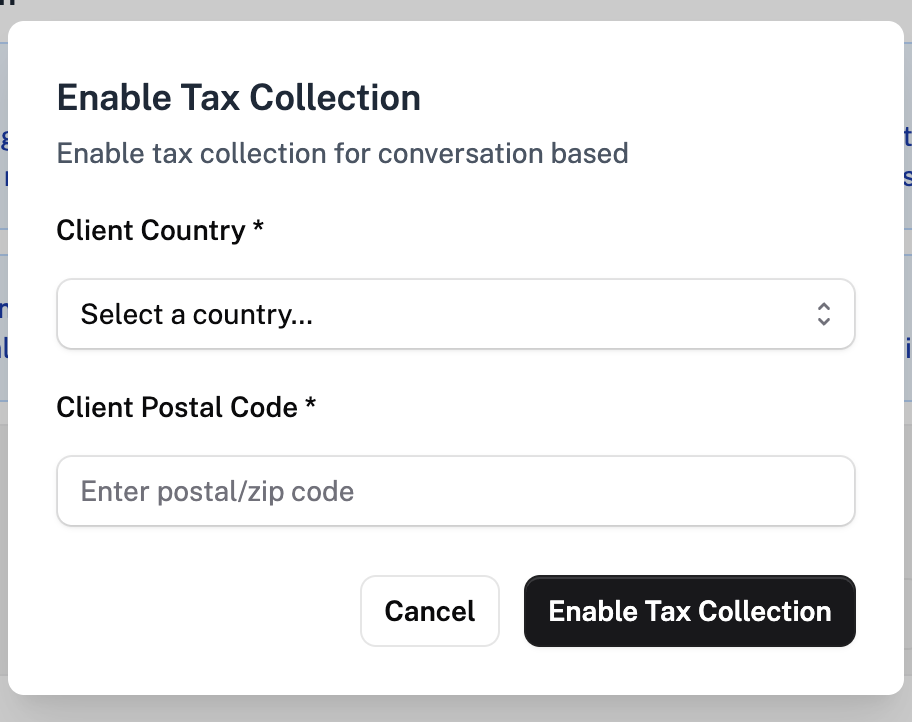
Click on Enable Tax Collection
For disabling tax collection for existing subscription
There will be a Disable Tax Collection button instead of Enable Tax Collection.